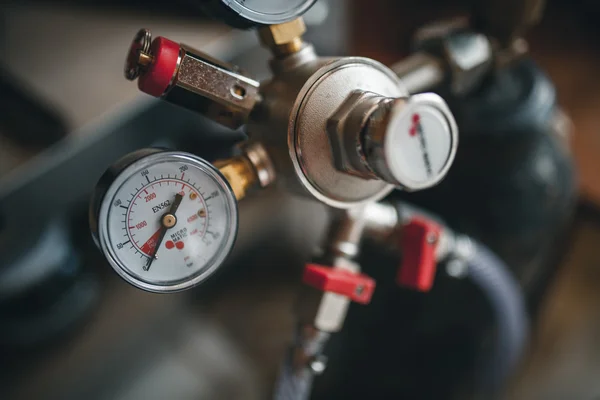
Compressed gas valves are sensitive components of any type of gas cylinder or ton container, from medical oxygen cylinders to containers designed for helium, hydrogen, and other commonly used gases.
It is vitally important to replace compressed gas valves at least every five years or when any damage or defects become apparent. An average of 20 deaths and 6,000 injuries occur due to compressed gas accidents each year, illustrating the consequences of compromising on safety around gas cylinders.
This brief guide will explain what tools you need, where to find the best replacement valves with longevity in mind, and what you and your workers must know about how to replace a compression shut-off valve.
Key Takeaways:
- Safely replacing a compression shut-off valve only requires 30 minutes of time and a few simple tools.
- The key points to keep in mind during a valve replacement are to first secure the gas cylinder, use all-new parts to ensure longevity, and check for leaks afterward.
- Chemtech International distributes reliable Sherwood compressed gas valves and related accessories that keep your equipment safe and functional for longer.
Preparations Before Replacing a Compression Shut-Off Valve
Always perform a valve removal or replacement in a well-ventilated area that is free of oil and excess dust. Make sure there are no possible sources of ignition, such as lit cigarettes or open flames, in the area. Many compressed gases are highly flammable.
A green sign on the cylinder with “non-flammable gas” displayed in the middle will indicate that the contents are not combustible. Even in those cases, however, it is best to avoid the hazard regardless.
Use clean, oil-free tools throughout the replacement process. The necessary tools and parts to have at the ready are:
- The new compressed gas valve
- A wrench that fits the valve body
- A new o-ring
Sherwood Master Shut Off Valves distributed by Chemtech International meet stringent certification standards and feature a design suitable for heavy-duty use. The 630 Series valves are easy to operate, highly versatile, and fully interchangeable with other manufacturers’ valves.

Sherwood also offers a full lineup of parts and accessories, including wrenches built specifically for their compressed gas valves, to fully flesh out your strategy of how to replace a compression shut-off valve.
Before you begin the replacement, perform a final check of the cylinder for any damage or debris. Point the valve away from you and open it slightly to verify that the cylinder is not under any pressure. Do not remove the valve if the cylinder contains any pressure or if you are unsure of the contents of the cylinder.
Instructions for Replacing a Compression Shut-Off Valve
With the right tools and an appropriately sized valve replacement, you can complete the entire compressed gas valve replacement procedure in less than 30 minutes. Learning how to replace a compression shut-off valve is a simple four-step process.
Step 1: Remove the Valve From the Cylinder
Start by securing the cylinder with a strap or chain. Use a wrench suitable for the valve body to loosen the valve from the body. Take a moment to listen for a hissing sound that might indicate that gas is escaping from the container. If you hear such a sound, do not attempt to continue with the removal.
When it is safe to do so, finish removing the valve either with a wrench or by hand. Before proceeding to insert the new valve, evaluate the threads of the cylinder to ensure they are clean and in workable condition. Discard the used o-ring, as these are not reusable.
Step 2: Insert the New Valve
Double-check that the threads of both the cylinder and the new compressed gas valve are free of any oil-based products or lubricants. If necessary, clean the gas valve before proceeding. Be sure to also verify that your new O-ring is free of any damage or defects. Place the new o-ring onto the valve, being mindful that the ring is delicate and easily damaged.
Attach the valve to the cylinder and begin tightening it by hand. If you sense that the valve is binding in the cylinder, detach it and check once again for damaged threads. When the valve threads onto the cylinder properly, finish tightening with a wrench calibrated to the dimensions of the new compressed gas valve body.
When learning how to replace a compression shut-off valve, keep in mind you should always connect valves and regulators directly to the cylinder. Never use an adapter to connect cylinders to regulators, and never use tape or any other sealing compound to patch a leaking valve or cylinder. You should instead remove from service any valve or cylinder with damaged threads.
Step 3: Inspect the Valve and Cylinder
Upon final torquing and tightening of the valve, there should be no gap between the bottom of the valve and the top of the cylinder. Keep in mind that if you are using an oversized o-ring, more torque may be necessary to fully tighten and seal the valve.
If applicable, inspect the valve’s safety device to ensure there was no accidental tampering throughout the process. The safety device should remain rated at the test pressure of the cylinder.
Without standing in front of the regulator, slowly open the cylinder valve. Check for any leaks at the site of the cylinder connection. If there are no leaks, turn the regulator knob to the correct pressure according to the cylinder’s specifications or intended use. Once the cylinder’s pressure drops below the usable level, fully close the cylinder valve.
Step 4: Prepare the Equipment for Use
In addition to learning how to replace a compression shut-off valve, proper training and safety considerations are necessary when using the gas cylinder for everyday operation. Preparing for normal use entails:
- Setting up the equipment by securing the cylinder, removing the protective dust seal, and always pointing the valve away from people
- Fitting the regulator and connecting the downstream equipment to the regulator outlet fitting
- Adjusting regulator delivery pressure with the adjusting knob or flowmeter
- Turning off the cylinder valve when you are no longer using the regulator
- Removing the regulator any time you are moving the cylinder

Learn More About How To Replace a Compression Shut-Off Valve
When you are responsible for maintaining, transporting, or operating compressed gas cylinders in any capacity, you have an obligation to uphold safe practices that can make all the difference both for yourself and others in your vicinity. This entails being conscious of the condition of the cylinder’s valve and regulator components, as well as being mindful of when a replacement is necessary.
Chemtech International offers the tools and replacement parts you need for how to replace a compression shut-off valve safely. Contact us today to learn more about our solutions and to get a free quote.
About Author

Neel Daphtary
Neel Daphtary is the President of Chemtech International. He oversees sales, distribution and business development. He excels at helping pharmaceutical and manufacturing firms find the right processes and environmental solutions. Neel is an active member of Global Philadelphia, an organization committed to community development in PA.


Have Any Questions Or Comments?
Call Us For Help!
888-709-8070